Category Archives: Bikepacking

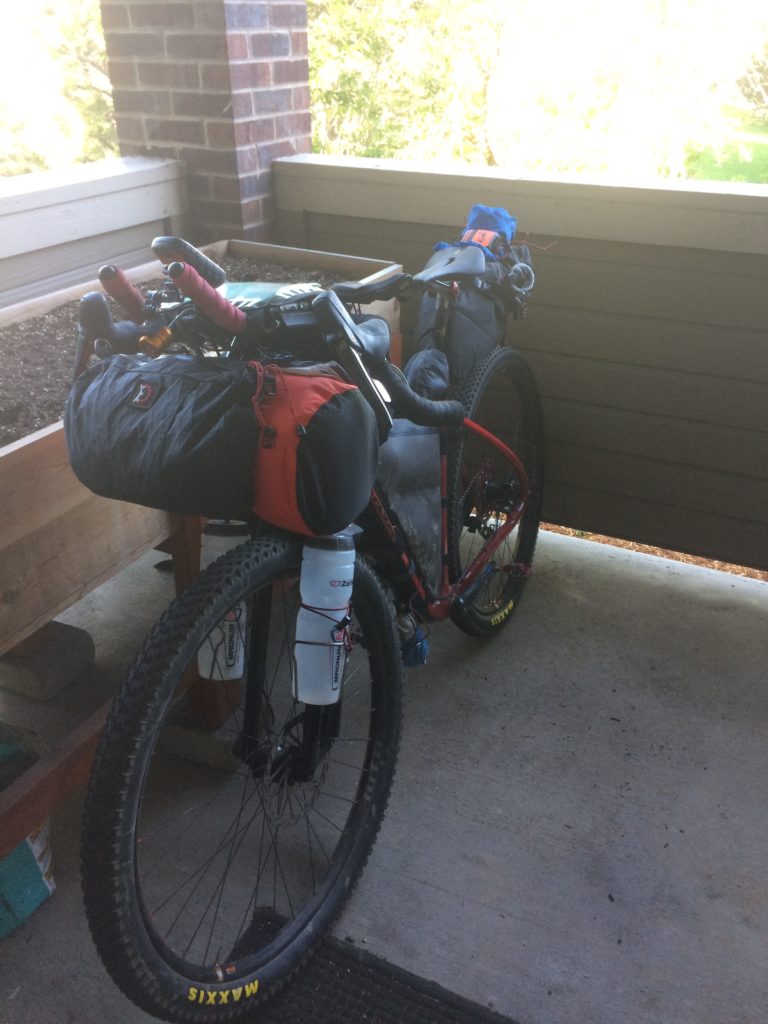
2018 Great Divide Tour Packlist

Weights + Capacities

  • Bike (w/ aerobars, cages, empty bags): ~29.5 lbs
  • Loaded bike (no food/water): ~46.8 lbs
  • Backpack: 5.6 lbs
  • On-body clothes + shoes: 3.4 lbs
  • Bodyweight: 148 lbs
  • Water capacity: 5L on-bike + more in backpack if needed
  • Food capacity: ~3 day, 2 night relatively comfortably (if 100% self sufficient)

Bike Specs

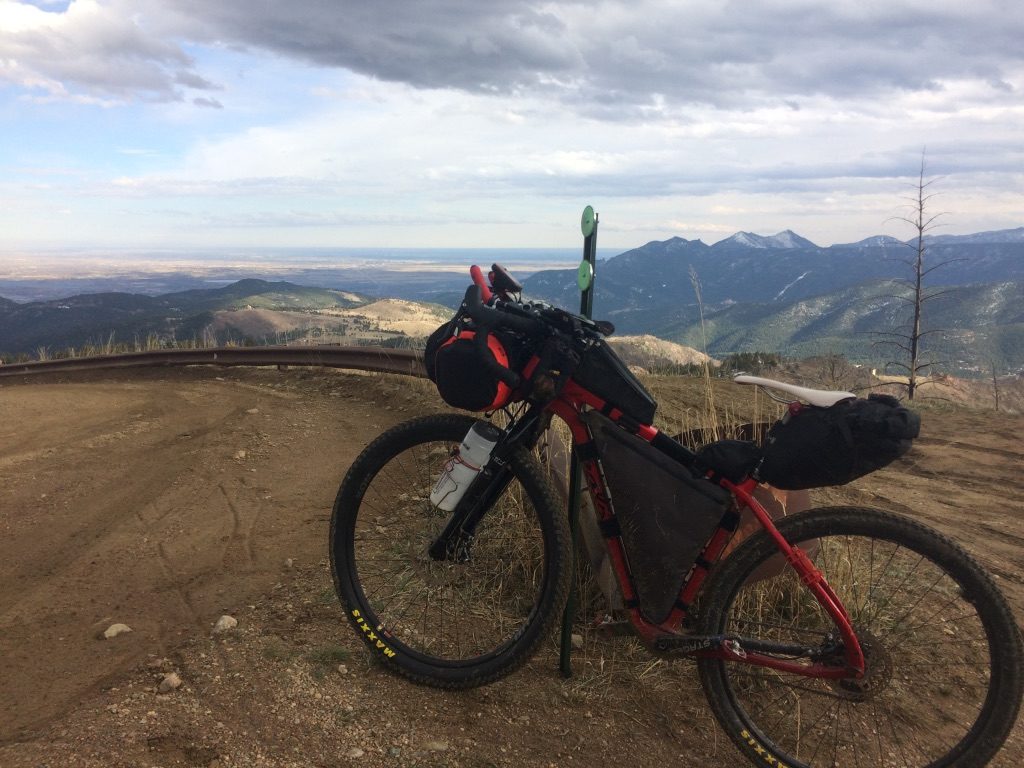
  • 2016 Salsa Cutthroat Size M
  • WTB KOM i25 rims
  • Hubs – Front: SP PD8X dynamo front, Sram X0 rear
  • Tires: Maxxis Ikon 2.3 front, 2.1 rear (tubeless)
  • Crankset: Sram XX 2×10 28/42
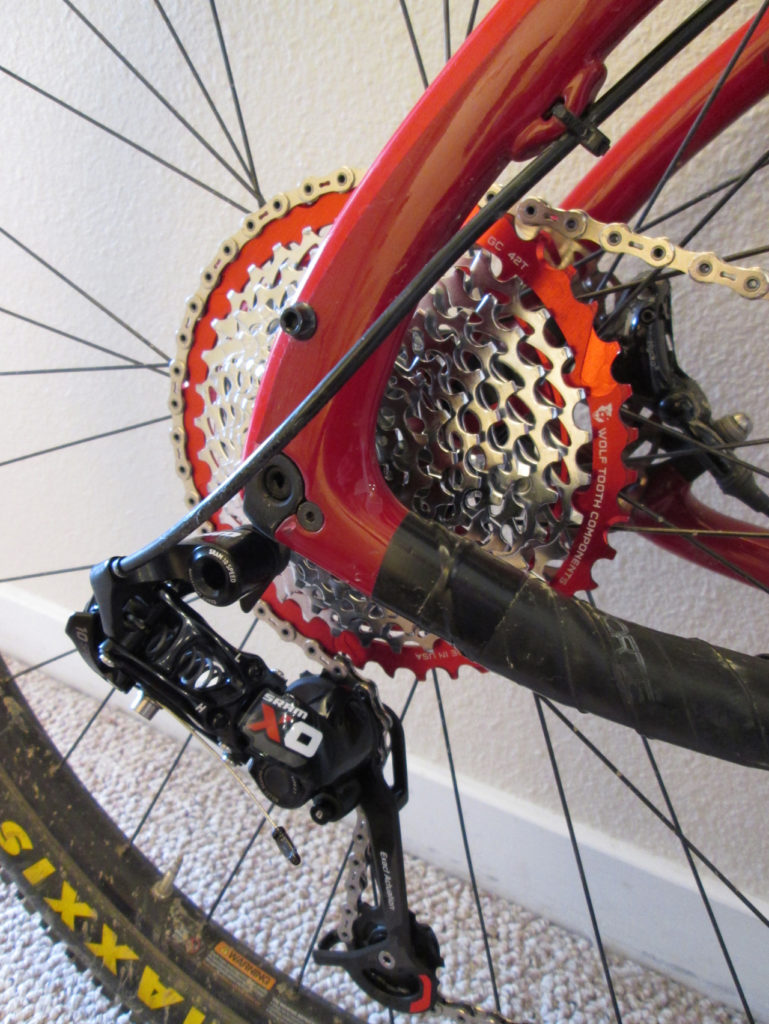
  • Cassette: 11-42t (Sram 11-36 converted w/ Wolftooth 42t + 16t)
  • Front/Rear derailleur: Sram X0
  • Eriksen Ti Seatpost
  • Barrel adjusters spliced into shift cables

Harness: Salsa Anything Cradle + Sea To Summit 13L Lightweight Dry Bag

  • Mattress Pad: Therm-a-rest Neoair
  • Bivy: Miles Gear Pico Bivy w/ footprint
  • Sleeping Bag: Mountain Hardwear Phantom 32
  • Puff Jacket: Patagonia Ultralight Down Jacket

Handlebar Bag: Revelate Designs Handlebar Bag (old version)

  • Electrolytes: 100ml E-lete (makes 10 gal), Nuun tab bottle
  • Misc pills: ibuprofen, vitamins, Benadryl
  • Bug spray: Repel 100 (0.4 fl oz)
  • 1L Platypus bladder + Sawyer Mini filter
  • Camp headlamp
  • Half roll TP
  • 1.25 fl oz DZ Nuts
  • Sea To Summit 1L Dry bag:
    • iPod Nano
    • Jackery Mini 3350 mAh battery #2
    • Spare USB storage drive
  • Phone in waterproof case
  • Wallet

Cockpit

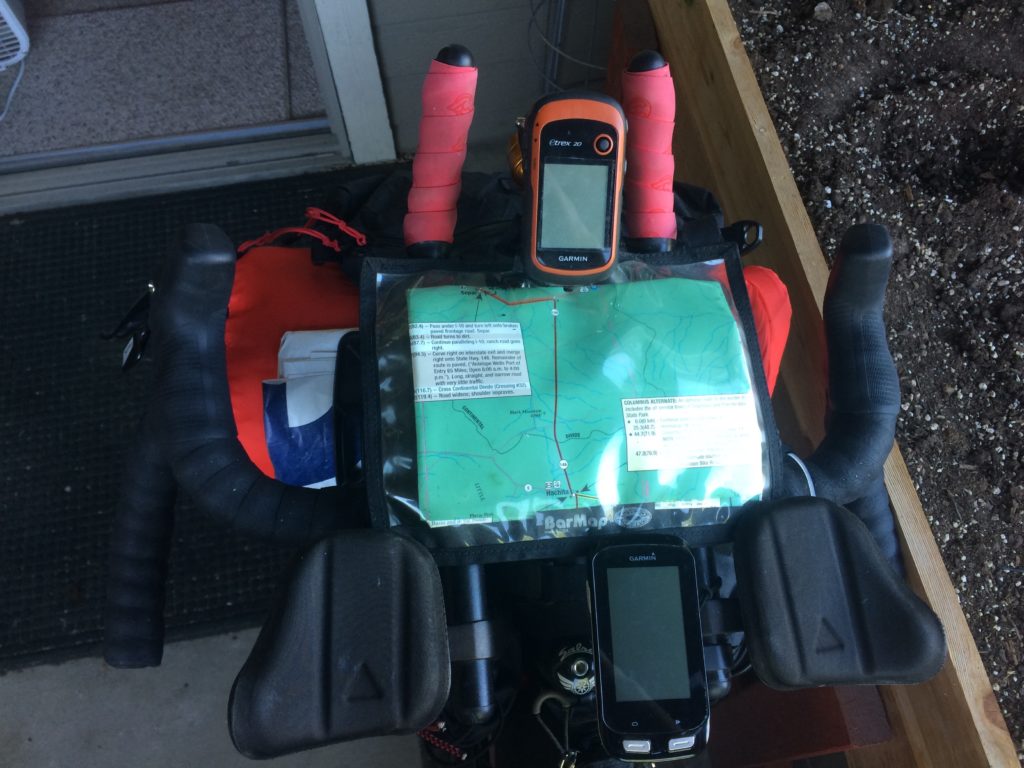
  • GPS: Garmin Etrex 20 (secured w/ tether)
  • 5×8.5″ Map Case
    • Current ACA map
    • Homemade services cue sheet
    • Mini journal + pen
  • Profile Design T3+ Aero Bars
  • Dynamo light: Klite Backpacker
  • USB charger: Sinewave Revolution
  • Bike computer: Garmin Edge 1000 (can act as backup GPS) (secured w/ tether)
  • Left Revelate Designs Feed Bag
    • Inside pouch: misc food items
    • Mesh pocket: camera – Sony Cyber-Shot DSCW810 (secured w/ tether)
  • Right Revelate Designs Feed Bag
    • Inside pouch:
      • Jackery Mini 3350 mAh battery #1
      • AUKEY USB Wall Charger (2x 2.4Amp ports + foldable plug)
      • Charging and data transfer cables
    • Mesh pocket:
      • Sunscreen
      • Chapstick
      • Hand sanitizer

Fork

  • 2x Zefal Magnum 1 liter bottle (secured w/ shock cord)
  • Lezyne HV pump w/ pressure gauge

Top Tube

  • Revelate Designs Gas Tank
    • Misc food items
  • Bolder Bikepacking Jerry Can
    • Bike multi-tool: Crank Bros M17
    • Multi-tool: Leatherman Squirt
    • Chain Lube
    • Iodine tablets
    • patches, tire lever, spares (bolts, stems, chain links, brake pad, etc)

Frame Bag: Salsa EXP

  • ACA maps 4-6
  • Bike cleaning rag
  • Drivetrain cleaning tool
  • Spare tube
  • Bivy pole
  • Spare sealant
  • Spare batteries (4x AAA, 6x AA, 2x CR2032)
  • Water bladder: MSR Dromedary 4L (max fillable to ~3L)
  • Spare food

Downtube

  • MSR fuel bottle (12 fl oz) (offset lower for tire clearance w/ Wolftooth BRAD system)
  • Spare tube #1

Seat Bag External

  • Bike lock (6′ cable + luggage lock)
  • SPOT Gen 3
  • Rain jacket: Outdoor Research Helium II

Seat Bag: Revelate Designs Viscacha

  • Camp pillow: Exped Air Pillow
  • Cookset
    • MSR Whisperlite International
    • Lighter + matches
    • Snow Peak 900 pot + lid
    • Snow Peak 450 mug (a 1lb peanut butter jar nests perfectly)
    • Pot Grabber
    • Windscreen
  • Toiletry + misc bag: Eagle Creek
    • Deodorant
    • Spares (iodine tablets + chapstick + lighter usb cables)
    • Foot powder
    • Toothbrush
    • Toothpaste
    • Butt maintenance: Bacitracin ointment + Clotrimazole
    • Misc med kit
  • Sugoi waterproof shoe covers
  • Aerostitch Triple Digit waterproof glove covers
  • Outdoor Research Helium rain pants
  • Space for LOTS of food

On-Body Clothes

  • Bibs: Ibex merino wool bibs
  • Base layer: Smartwool t-shirt
  • Jersey: Smartwool Flagstaff full zip
  • Socks: Smartwool PhD Light Mini
  • Pearl Izumi Sun Sleeves
  • Shoes: Pearl Izumi X-Alp Launch II
  • Watch: Timex Ironman
  • Road ID
  • Helmet
    • Fenix LD22 headlight
    • Rear blinky

Backpack: Osprey Syncro 15

  • Spare clothes
    • REI Zip Camp Pants
    • Long sleeve shirt: Smartwool Lightweight
    • Socks: Smartwool PhD Light Mid Crew
  • Misc clothes
    • Marmot wind jacket
    • Smartwool liner gloves
    • Pearl Izumi Soft-Shell Lite Gloves
    • Smartwool beanie hat
    • Boonie hat
    • Wool Buff
    • Pearl Izumi Barrier Leg Warmers
    • Pearl Izumi Barrier Arm Warmers
    • Bandana
  • Prescription sunglasses: Wiley X Valor (transitions from clear to dark, semi-polarized) (I should’ve bought prescription glasses LONG ago!)
  • Spare 1L Platypus bladder
  • Spork
  • Syringe for back-flushing Sawyer Mini filter

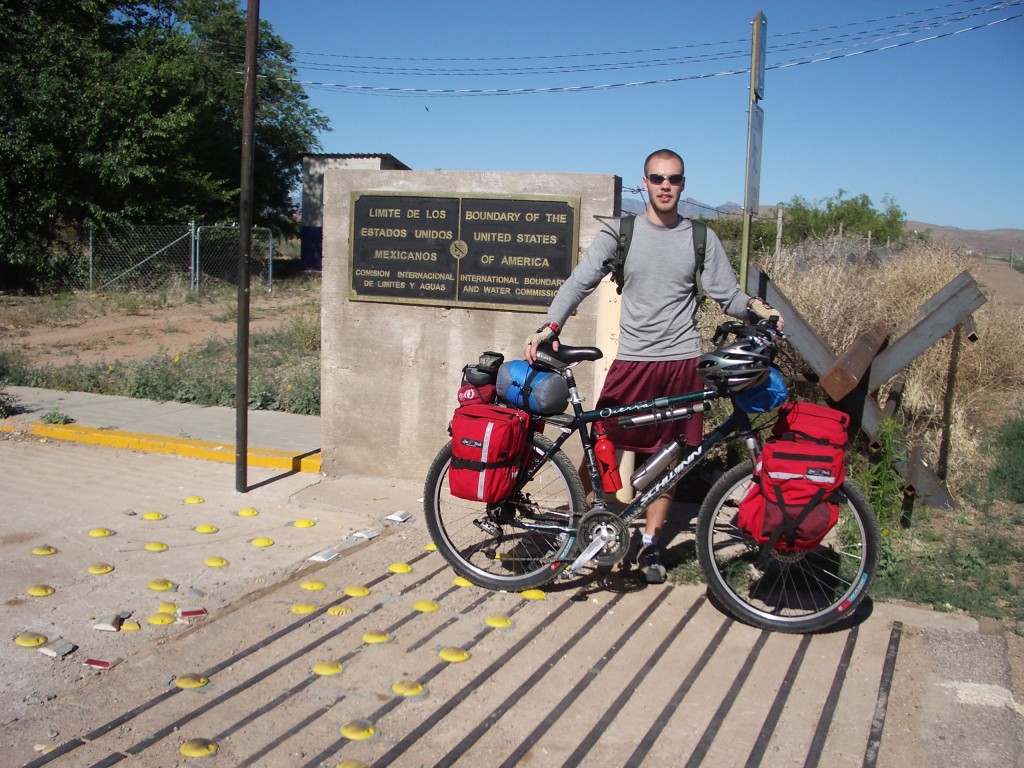
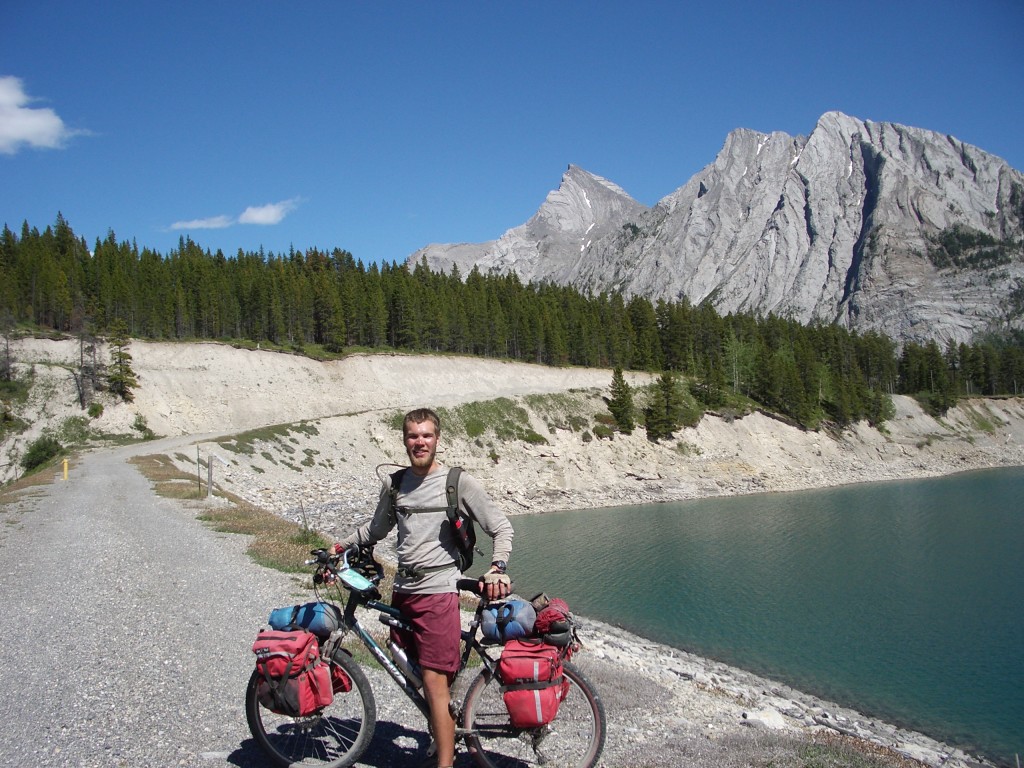
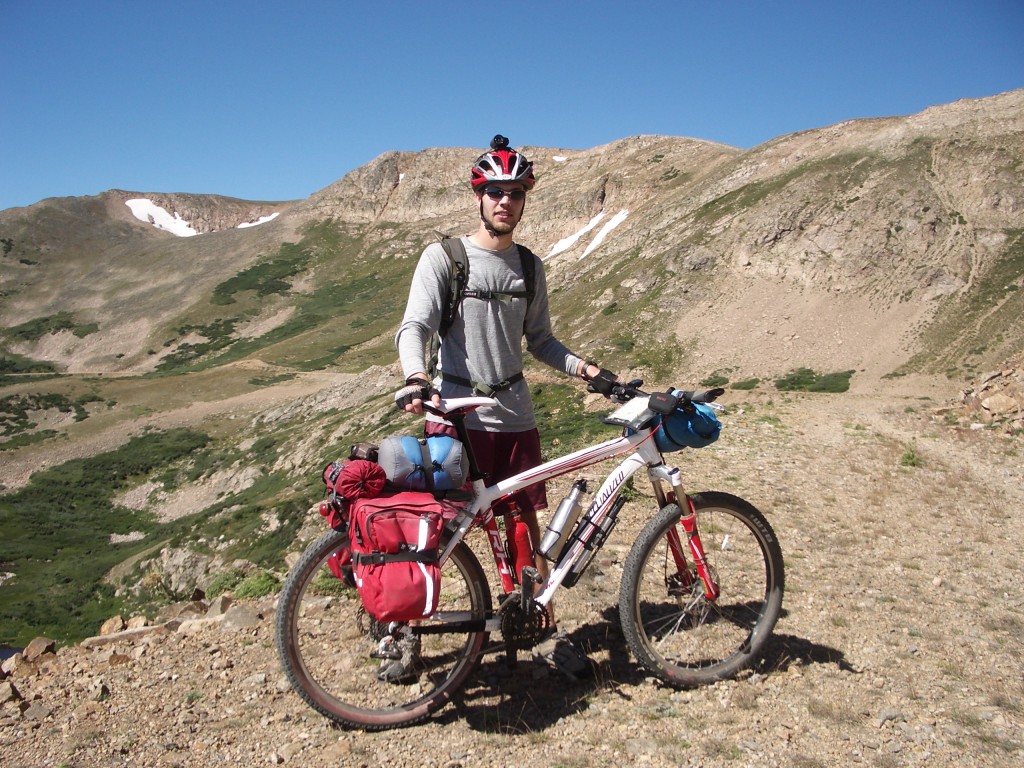
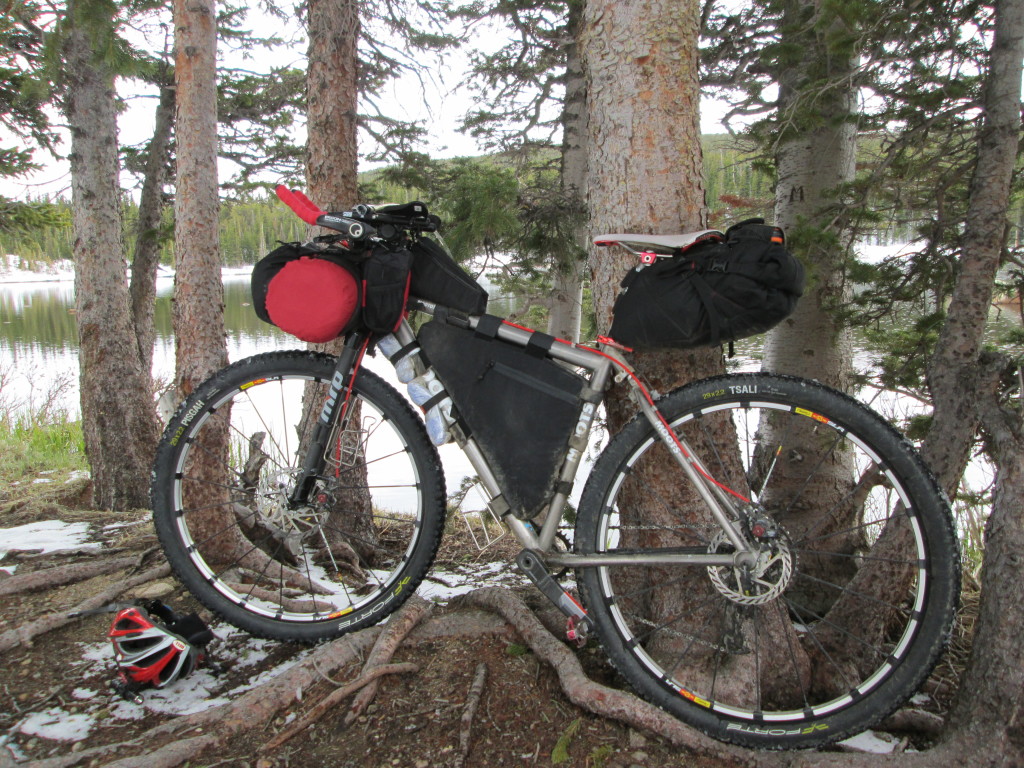
For comparison, in 2010 my bike looked like this:
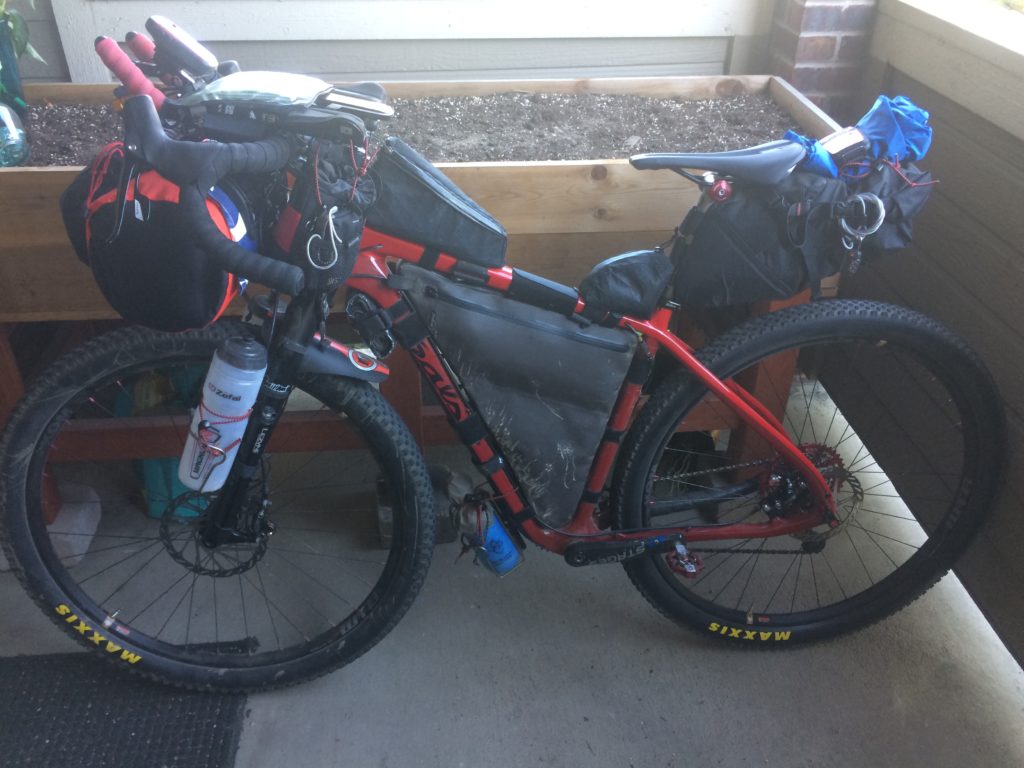
Mile 0: Clean

Mile 2700: Dirty

On The Road

In less than 24 hours my parents, girlfriend, and I will be driving down to Deming, NM (where I spent a few days in a gas/Greyhound station waiting for a lost bike).  Early on Thursday morning we’ll drive 1.5 hours to Antelope Wells, where I’ll affix all my bike bags, say my goodbyes, and be off on this adventure.  I’m going back and forth between feeling excited and terrified.  Once I’m on the bike in AW I’ll take things as they come, rather than worrying about every unknown and “what if.”

First Days Rough Itinerary (subject/likely to change):
Day 1: AW to Silver City (125 miles, 3k feet elevation gain)
Day 2: Silver City to Beaver Head Work Center via CDT alternate (75 miles, 9.6k elevation gain)
Day 3: BHWC to Pie Town (98 miles, 3.5k elevation gain)
Day 4: Pie Town to Grants via El Malpais alternate (70 miles, .6k elevation gain)
Grants to Cuba: undecided on main route vs Chaco alternate

Put into perspective, it took us 7 riding days and a rest day to get to Grants in 2010.  I’m trying to push myself pretty hard, testing my Colorado mountain-seasoned legs.

Links to Follow Along
This page should shows other me and other GDMBR riders: http://trackleaders.com/divide
My individual page: http://trackleaders.com/dividei.php?name=Dave_Gieger
SPOT: https://share.findmespot.com/shared/faces/viewspots.jsp?glId=0Cqs7vRDcHti26L8C70ZlC2NvBZ5rUngK
Strava: https://www.strava.com/athletes/809548
Flickr: https://www.flickr.com/photos/david-gieger/albums/72157696936507084


Adjusting My TD Bike For A Great Divide Tour

Tour Divide bikes are typically set up to be fast and light – capacity to carry enough food and water until the next resupply with little room to spare.  Very few luxuries are packed.  If you’re not eating or riding, you’re probably sleeping.

When I decided to tour part of the GDMBR instead of race it, a number of variables changed.  I had intended to average 120 miles/day when racing.  Now I think I can do 75-100 miles/day depending on terrain and services and still stop to take more pictures, enjoy more sit-down meals, set up camp earlier in the evening, and enjoy cooked campsite breakfasts/dinners.  And since I no longer need to make mileage at all costs, I can afford to pack a few more luxuries (within reason).

Now that I’m touring part of the route, these are the luxuries I’ve added:

  • Cook set: stove + pot + mug + fuel bottle
  • Zip-off camp pants + a spare shirt
  • Boonie hat (possibly)

A few very simple things that I think will hugely increase my enjoyment on the trip.  I’ll be able to start the day with hot oatmeal and tea or coffee and cook a dinner while watching the sun set.  With some spare clothes, I’ll have something to change into that isn’t nasty riding bibs/jersey.  Plus, on rest days, I’d rather walk around in less-nasty clothes.

These additions come at a cost, though: weight and volume.  Honestly, the weight isn’t a huge concern for me.  Back in 2010 I carried denim jeans, a pair of keen shoes, a spare poncho, a full 1 person tent, 20 oz fuel bottle, a solar charger, and the “Cycling the Great Divide” guide book.  Additionally, since then I’ve replace many of the other items (water filter, multi-tool, tire pump, sleeping bag, tent) with smaller, lighter alternates.  With unseasoned legs and all that extra weight, I still managed to complete the entire Great Divide, albeit walking much of the time.  Adding 2-3 pounds of luxury items (a cook set + pair of pants) to a relatively minimal setup isn’t going to make or break my trip.  I don’t know what my old rig weighed with gear, but I’m guessing my current setup, even with the two new additions, weights 10-15 lbs less.

Volume is the killer, though, with my racier bikepacking setup.  In 2010, I had four panniers, a backpack, and the tops of the racks to strap stuff onto.  I remember riding into the Great Divide basin from Rawlins with 10 liters of water in addition to 2-3 days of food and normal day-to-day equipment.

Now I’m limited to a handlebar roll + bag, feed bags, fork and under-downtube bottle cages, frame bag, top tube bags, and a seat bag.  The clothes and especially the cook set use a decent amount of volume in my seat bag that would otherwise be used for food storage.  The additional catch-22 is that I’ll ride through resupply points less frequently, so I need to carry more food, and I’ll need more food/water to fuel carrying the extra weight.

How To Increase Storage Capacity?

The easiest solution is to carry a backpack.  There are some major downsides, though: extra sweating from less jersey ventilation, increased weight on the saddle and hands, and I haven’t worn a backpack while riding for many years.  I wanted to avoid this option if possible.

Adding storage volume without a backpack takes some creativity.  I purchased a pair of bike feed bags and rigged them up so they could hang off the sides of the seat bag.  It looks super dorky but they can hold a decent many thousands of food calories.  In addition, I can pack a micro stow-able backpack – the kind that packs down to the size of two golf balls and weighs 3 ounces – to expand storage capacity only when it is necessary.

The downside to it is that food is heavy, and having that weight high up, off-center, and not entirely wobble-free made the bike feel very heavy while riding.  I tried it on some test rides, but I couldn’t feel confident that this system would last the duration of my trip.

So – what about a backpack then?  I have an old Osprey Syncro 15 that I used on the Colorado Trail that is ready for service.  It’s simple, adds a LOT (15 liters) of storage capacity, and easily handles odd-shaped things like a stack of tortillas.  Loading a backpack is much less of a game of Tetris than loading a seat bag.  And unlike in 2010, I’m smart enough now to know to use the backpack for lightweight, bulky items: like spare clothes, rain items, and food that I’m about to eat.  NEVER EVERY would I carry water on my back on the Great Divide.

I’ve chosen to go with the backpack.  95% of the time it’ll carry only my spare clothes.  The flexibility it affords also reduces my packing anxiety.  If it starts raining, I can quickly throw anything into the backpack and it’s protected.  At night, I can throw spare miscellaneous items in it and everything is together and waterproof – simpler than fitting everything back the various frame bags.


We’ll see if I regret the extra weight on my pressure points, but it is comforting to know I have more volume available for food/water and less packing Tetris to deal with.


Training And Change Of Plans

April Training

I trained for the Tour Divide through April logging ~700 miles and ~50,000 feet of elevation gain.  Most rides were gravel grinders in the Boulder/Longmont area.  I feel that I’m a strong climber but struggle far more on longer days without large climbs/descents.

One of the harder rides was a loop from Boulder to Nederland via Flagstaff/Gross Res/Magnolia, then north on the P2P and back via Gold Hill and Sunshine.  I carried 4.5L water and enough food for the entire day to simulate the TD more closely.

The month was capped with two back-to-back 75 mile rides – one with 6,600ft of elevation, the other with 2,900 ft of elevation.  The first ride caused a lot of chafing, but I wasn’t smart enough to apply chamois cream.  I really paid for that oversight the next day, which was a flatter “sit in the saddle and spin” kind of day.  For the high ft/mile of the first day and soreness + butt pain the second day, I think the ride times and average speeds were pretty respectable: 11.4mph and 12.8mph moving average (9.9mph and 10.4mph overall average).


May Training

Things fell apart in May.  Today is May 29th, and so far I’ve ridden 117 miles over 5 rides…  I just lost motivation to train.

Change of Plans

Once again I’m not ready to race the Tour Divide.

In May I went through some personal things that were mentally and emotionally draining.  I couldn’t bring myself to get on the bike.  The longer I went without riding, the more guilty I felt, and the more I was worried about losing my fitness.  I didn’t want to ride, because I’d see how far I had slipped in terms of fitness.  It became a feedback loop.

In April I finalized my transportation to Antelope Wells.  Balancing my girlfriend’s and parent’s schedule, I’m able to be dropped off at Antelope Wells on the morning of June 7 (the day before the Grand Depart).  If I were heading southbound from Banff with the Grand Depart, I think the mid-pack camaraderie of “being in it together” would help forward progress and make the race worthwhile.  Riding northbound, and leaving a day before everyone else made it feel not like a race.  Since there are far fewer NoBo racers, I’d likely ride alone – maybe the entire way.  Would I be able to push myself to the limit for 3+ weeks on my own?  Do I want to?

I can imagine arriving at a great camping spot in the late afternoon.  The racer pushes on.  The tour-er can camp and cook a meal.  What about when I arrive in cool towns like Del Norte, Salida, and Frisco?  The racer stops at subway and a gas station or grocery store for resupply and continues riding ASAP.  The tour-er can visit a brewery, enjoy a sit-down meal, and (gasp) even take a rest day.  The racer values forward progress at the expense of almost everything else.  They’re out there to test their physical and mental limits.

That’s not to say that racing is bad – maybe it’s not for me right now.  I respect the dedication and willpower that racing the TD takes (and any other bikepacking race).  I think I cling to the idea of racing the TD because I want to be seen as someone with the willpower to do hard things.  But at the same time I don’t want to sacrifice so much on the “fun” side of it.

So WTF Dave?  I went through this exact same thing 3 years ago.  I decided then that there wasn’t enough balance between pushing myself and enjoyment.  Earlier this year I thought that I was okay with it, but not so much anymore.

If my hesitation to racing the TD is the rigidity of forward motion at all costs, I shouldn’t race.  A week into the race, I might pass through Salida and absolutely hate that I have to be in and out in 1-2 hours.  That’s a recipe for quitting the race.

Why couldn’t I decide to tour all or part of the route?  Is it ego – being a “racer” or being able to say I’m riding all the way to the opposite border?  Maybe I originally wanted to race the TD because being away from work for 4 weeks is easier than 6-8.  Sacrificing a month of billable work is less impactful than two – on top of there being far less travel/lodging/food expenses.

What Now?

I’m still starting in Antelope Wells on June 7, but my plan is to ride ~1,000 miles of the GDMBR to the Silverthorne/Kremmling area, then ride east through Winter Park, over Rollins Pass, through Nederland, then back down to Boulder over 14 or so days.

My new goal is to push myself on the bike every day and close to double my daily mileage compared to my 2010 tour – between 70 and 100 miles per day.  I want to push myself but still have the opportunity to take a rest day when needed, stop early in the day if I reach a nice place to camp, or grab an early hotel in town if the weather is turning for the worse.

It’s very possible that next winter I’m going to think about the Tour Divide again.  Having this trip under my belt is going to help with that.  I’ve built up the TD/GDMBR in my head for the past four years that I’m so far disconnected with the reality of it.  Doing 1,000 miles of the route will remove the uncertainty of what my capabilities are, how difficult the days actually are for 2018 Dave vs 2010 Dave, and maybe solidify future “TD or Not” decisions.

Gear Inches and Granny Gears

On some recent climby training rides, especially when feeling effects of accumulated fatigue, I found myself wishing for a lower granny gear.  I’ve been riding a 28/42 crankset + 11-36 cassette.  With a 2.2×29″ tire, that’s roughly 22.5 gear inch granny gear (and 110.3 gear inches on the high end).  I’ve been riding this for a while now and it’s been fine for normal, unloaded riding.  Throw in back-to-back long/climby days and 20+ lbs of gear, water, food, and trying to ride at a more sustainable “all day” pace – a lower granny gear would be nice.

Back in 2015 when I trained for the TD I was running a 1×11 with a 30-42 granny – 20.6 gear inches.  I never considered that granny gear to be inadequate, but I didn’t like how I spun out almost any gradual descent.  The high-end was a meager 86.7 gear inches.

So I figure I have two options:

  1. Replace the 28/42 chainrings with 26/39.  That would change the gear inch range to 20.9 – 102.5.  A granny gear 7% lower than previously.
  2. Keep the 28/42 chainrings and add a 42T Wolftooth cog to the cassette. Gear inch range:  19.3 – 110.3.  A granny gear 14% lower than previously.

I opted for #2 and installed it last night.  It offers a lower granny gear without sacrificing the upper range.

Because we’re adding a new granny gear, a different cog must be removed – typically the 15T or 17T.  The downside is that it introduces a larger jump between gears: 11-13-17-19-22 or 11-13-15-19-22.  Of course, Wolftooth thought of a solution for this: replace the 15T and 17T with a 16T cog.  So the stack looks like 11-13-16-19-22.  Two 3T jumps jumps instead of a 2T and 4T jump.

And here it is, in red of course.  Very nice looking!

In the work stand everything sounds and works fine.  For the first time ever, I actually had to add links (just one) to a new chain for it to be the proper size.  We’ll see how it works in the field soon enough.  Mental notes to myself: how noticeable the lower granny gear is?  Has shifting crispness has changed at all? Are the jumps between the 13-16-19 cogs more jarring?


While on the topic of gear inches, I just had to figure out my granny gear of the commuter bike I rode on the Great Divide in 2010.  28/38/48 crankset + 11-32 cassette with 2.2×26″ tires: 23.1 gear inch granny gear.  So slightly harder than the cutthroat’s 28/36 granny.  Considering I had never ridden in mountains, inefficient bike position, a heavy bike, and a far more/heavier gear I don’t know how my knees didn’t explode.  On the high end, the 48/11 combo gave 115.2 gear inches.  Even with such a tall gear, I remember spinning out on various descents, wishing to be able to pedal to generate some warmth.

Tour Divide: Southbound vs Northbound

I put my name on the start list in early February as a Southbound Grand Depart participant.  After reading reports of above average snowpacks in Canada/Montana, and below average snowpacks in New Mexico/Colorado I’m starting to consider a Southbound start.

Reasons to Ride Southbound

I signed up as a Southbound racer for a few reasons: to be part of the Banff Grand Depart experience, easier travel arrangements (fly to Calgary, have family/girlfriend waiting in Antelope Wells), and more chance of companionship.  Ego, convenience, and safety in numbers.

There’s certainly an appeal to being part of the mass start.  Being mid-pack with other racers, lots of people on the route would know what we’re doing.  I remember riding into Cuba and having drivers wave at us as if they knew we were touring the GDMBR.  It felt good to get that recognition.

Travel arrangements are easier for me ending in AW.  My family lives in the Denver area, so for them to get to AW is just a 11 hour drive.  I imagine being able to arrange something roughly like, “once I’m halfway between Pie Town and Silver City, Drive to Silver City and wait there.  Once I hit Separ, start driving to the border.”

Companionship shouldn’t and can’t be counted on, but early in the race I think it would help to build confidence before settling into a routine.  Knowing that there will be 100 others around +/- a few days is psychologically comforting.

I think I would prefer ending the race in Antelope Wells, having completed the route the other direction.  A tour or TD race is such an experience that I want a chance to reflect on the trip.  The solitude of the desert and boredom of flat pavement would let that happen.

I remember riding up the Spray River Trail rounding a corner and suddenly being at the trailhead, my GDMBR trip finished.  I suddenly became just another tourist in Banff.  Instant culture shock.  Suddenly thrown into a crowded town that doesn’t match the experience of the preceding 2,700 miles.

Reasons to NOT Ride Southbound

  • Colder weather in Canada/Montana
  • Hike-a-bike due to large snowpack
  • Hike-a-bike through snowmelt
  • Hotter weather in New Mexico
  • Less surface water available in New Mexico
  • Greater chance of monsoons + peanut butter mud in New Mexico

Cold is one of my greatest fears. The 2014 race started with a week of snow and rain.  As someone whose feet sweat profusely and constantly has cold hands (poor circulation?), that sounds miserable.  Like quit-the-race miserable.  Walking through snowmelt runoff streams for the first few days – I imagine my feet would get numb and stay that way all day, regardless of clothing choices.

Then there’s the “unknown.”  Most rookies go into the race with no firsthand knowledge of the route.  I have the small advantage of having ridden S=>N once before.  I know roughly what supplies are available at various towns.  I remember some water sources in dry areas, and can remember roughly what much of the route looked/felt like.  If I were to ride southbound, my knowledge of the climbs would be wasted.  I had to hike up Fleece Ridge and suffer up the climb out of Radium, but I got to enjoy massive descents down to Abiquiu and Del Norte.  I don’t know what the experience is like in the opposite direction.

It’s typically stated that the route Southbound climbs gradually and descends steep.  I think my riding style now favors steep climbs and more gradual descents – the Northbound direction.

General Race Outlook

When I was sure I was racing Southbound, I mostly felt worried about prolonged wet/cold and being in bear territory on day one.  Plus, ending day one with a 3 hour hike-a-bike up the quad trail/river to Koko Claim is a bit daunting.

When I consider riding Northbound, it feels like a weight is lifted from me.  I’ve ridden that direction before.  I don’t have to worry nearly as much about weather.  Getting to Silver City and beyond should be a relatively simple first day.  Getting through the Gila to Pie Town and Grants will be challenging, but it can be planned for.  I’m accustomed to riding in mountains, unlike eight years ago.

I think I will gain a lot of confidence on days one and two if starting in AW.  I remember struggling on the “hills” between Hachita and Silver City.  I remember the first climb on gravel heading into the Gila, how I had to walk after a few hundred yards.  And also the climb out of Black Canyon 30-40 miles later.  From my journal:

The climb out of the canyon was absolute hell. It consisted of many miles of steep roads covered in loose gravel. It had me pushing my bike in no time. Even that was difficult.

After checking elevation profiles on Strava, the climb out of Black Canyon is a 2-mile 6-7% climb.  “Absolute hell” for 2010 Dave, but not a big deal at all for 2018 Dave.  I look forward to doing those climbs again and thinking to myself “hey, I can do this thing!”

In Summary

I’m 90% sure that I’m going to ride South to North at this point.  And if I do choose to go Northbound, the question then becomes: leave with the NoBo Grand Depart, or leave a day or two earlier, or leave a few hours earlier (daylight is more of a premium in NM)?

Southbound Pros

  • Group start experience
  • Not likely to ride completely alone
  • Easier pickup from AW

Southbound Cons

  • Cold, rain, snow
  • Snowpack = hike-a-bike
  • Flying with bike: possibility of damage
  • Heat + mud in NM

Northbound Pros

  • Drive to start: no bike reassembly
  • Cooler in NM/CO
  • Warmer in MT + Canada
  • Less chance of NM mud
  • Climb steep, descend gradual

Northbound Cons

  • Likely to ride alone the entire race
  • Sparse resupply immediately

Tour Divide Training: February – March 2018

February
I continued with TrainerRoad’s Sweet Spot Base II Mid Volume plan, which wrapped up on Feb 24.  I only did a total of three outdoor rides this month for a total of 73 miles.  It’s easy to look at that and feel unaccomplished.  I have to focus on the fact that I did 14 hard trainer rides, which are far more effective at building strength than outdoor miles.

March
March started with a recovery week after the Sweet Spot Base phase, then another FTP test.  This time I scored an FTP of 242 – up 4% from my previous test and up 10% from my first test.  W/kg: 3.68.  It felt good to achieve a higher number.

The next few rides I did outside, and I noticed that I felt unbalanced on the bike.  Riding outdoors (and actually moving) didn’t feel natural.  That was a bit disconcerting.  I decided that it was time to start riding outdoors more.

I attached all bags, bottle cages, lights, and gear to my bike in mid-March to start acclimating to the heaver load.  I’ve loaded about 95% of my gear (some kinks need to be worked out), and now always carry extra water for training weight.  I even did a night ride to start getting rid of the “dark trails are scary” feelings.

I ended up logging 402 miles over 12 rides plus another three trainer workouts.  I definitely need to step it up in April.

Tour Divide Training January 2018

What?!  Tour Divide training?  Official Letter of Intent coming in the future, but yes, I am committed to racing the Tour Divide this year.  I even added myself to the official unofficial start list.  I’m going to start recording my training (physical and otherwise) to help organize my thoughts and keep myself accountable to making it to the start line.

Training Plan

When I trained for the TD in 2015 (but didn’t get to the start line) I just rode my bike a lot.  Long days in the mountains, hill repeats, etc all with my bikepacking gear.  I think what I did would have adequately prepared me to complete the race, had I shown up.  It wasn’t very efficient, though, and I have no idea how strong I was at the end of training compared to the beginning.

That is going to change this year.  I like plans, numbers, and measurable results.  I finally bought a power meter and dedicated trainer wheel for my Cutthroat – it was long overdue.  Armed with power data and a TrainerRoad subscription, I have one goal for now: increase my FTP as much as possible until Spring.  I would be very happy to be in the 275 to 300 watt range prior to the Grand Depart.

Here’s the high-level physical training plan:

  • Sweet Spot Base I (complete)
  • Jan 22 – Mar 3: Sweet Spot Base Phase II Mid Volume (in progress)
  • Mar 5 – April 28: Sustained Power Build Phase (doing increasingly many rides outdoors with gear)
  • May: More logistical rides (multi-day rides, set up/break camp in rain, specific elevation/mileage goals, night riding, etc.)

Progress So Far

Last November when I started training I took my first 20 minute FTP test and achieved a result of 220.  At 145 lbs that put me at 3.34 W/kg.  Pretty solid, I think, for having never trained with any structure beyond “I feel like riding today.  I’ll go…there!”

I started with TrainerRoad’ Sweet Spot Base Low Volume I, but found myself wanting a bit more work during the week.  Halfway through I switched to Mid Volume I to add an extra hard workout to weekends and a mid week low intensity endurance ride (this one I often skip, because BORING).

Near the of January I started Sweet Spot Base Phase II and took my second FTP test: 232 and 3.53 W/Kg.  Immediately after I finished I realized I could have gone bit harder.  My 5 minute splits were 237, 245, 245, 254.  I certainly suffered, but not nearly as much as during the first test.  I think upping my cadence from low 80s to mid-90s helped a ton as well – gotta burn fat and save that sugar!

As of the end of January I am in the middle of the second week of Sweet Spot Base Phase II.  It’s certainly type II fun, but I really enjoy being able to feel worked after 1-2 hours.  If I were doing 1-2 hour rides outside I wouldn’t get nearly the same quality of workout.

I really looked forward to my second FTP test and still feel the same way about my upcoming third test.  Being able to measure improvement is so motivating!  I hope to see even more improvement in my next FTP test than my second.  High 240’s would be great.  250+ would be a nice milestone to break, too.

What I’ve Learned

Learning about FTP, power zones, and pacing has been eye-opening.  Same with the instructions that display with TrainerRoad workouts.

I’ve been pedaling incorrectly this whole time!  Prior to TrainerRoad my natural cadence typically fell in the 80-85 range, probably lower on climbs.  What I didn’t know is that puts my fuel consumption further into the sugar side of the spectrum than ideal.  Spinning faster allows the body to burn more fats instead.  Spinning a cadence of 90+ now seems very natural.

In the past I thought there was value to doing long or hard rides with minimal food to train your body to do without it.  I now realize that improper nutrition gets in the way of training effectively.  I still think there is value to pushing through those discomforts on purpose occasionally, I see them as destructive session rather than constructive.  Rides like that might make you mentally tougher and unlock some “I made it through that, so I can get through this” attitude, but might not contribute to physical fitness effectively.

I also now understand the concept of power zones and their physiological tolls.  Most importantly right now: an all-day pace that an endurance rider can sustain is in the range of 60-75% of their FTP.  Obviously a person with a higher FTP can put out more power all day than another rider with a lower FTP.  Additionally, higher FTP means you can stay in your efficient zones for more time.  Take two riders with FTPs of 200 and 250.  Both can sustain 175 watts for a time, but it will be far more taxing on rider one.  175 watts falls on the high end of tempo whereas it is solid endurance zone for the stronger rider.  Short bursts into the 225 watt range would put rider one into anaerobic zones whereas rider two stays aerobic.

When I look back on the Great Divide, I realize how much fitness I lacked.  I was constantly miles behind the other guys and had to work hard to not be too slow.  I was likely riding well above my endurance pace, taxing my body more than if I rode consistently at my all-day pace.  I imagine that my fitness was in a state that so many of the climbs put me far into the red and robbed my of any semblance of sustainability.  Oh how I wish I had a power meter back then, so I could compare myself then and now and “forecast” future results.

Well, that’s it for now.  I gotta hop on the trainer and knock out a 3×16-minute over-under interval workout.

Nostalgia

Darkness comes early in the evenings these days.  I’ve experienced bouts of bike-related nostalgia. With last season long gone, I’ve been thinking of the rides I did, the trips I didn’t do, and memorable trips of the past few years, and how it all began.

Beginnings

I started riding during the summer after my first year of college. I took my 07 Schwinn Sierra GSD on the bike paths that I had run during high school cross country and track.  Amazing how much more distance a bike can cover with less effort!  The bike came to college the next semester and I discovered Dayton, OH has miles and miles of amazing bike paths.

Exploration

Biking was so much simpler for me back then.  “Pure” is a good way to think of it.  I didn’t have fancy gear and didn’t care about weight and component levels.  With a can of V8 juice, a sandwich bag of cereal, and two re-used gatorade bottles of water and I’d be good to go.  On a whim I’d bug out and explore the Ohio farmland and arrive home 50 unplanned miles later.

One weekend I chose to ride to the Indiana state line…just because – an 80 mile out and back.  Not even a mile after reaching the state line and turning around my tire was punctured by road debris.  I had a spare pump and patch kit, but lacked the knowledge of how to properly apply a patch.  After numerous failed attempts to get a patch to hold pressure, I started walking home.  After 10 miles of walking and chickening out on sticking a thumb out, I got through to a buddy who could drive me home.   How naive to go on such a ride with so little preparation.

A few weeks later, I rode to the Indiana line again,  but this time continued until I hit 50 miles.  That was my first century.  No special athlete food, no electrolyte mixes, no carbon road bike, and no aerodynamic spandex.

Almost every weekend I’d flip the bike upside down, strip its components, and clean/lube everything.  I cared so much for that crappy, heavy “comfort” bike.

Going Further

That winter, I developed the notion that it would be cool to bike from Ohio up and around Lake Michigan, then down to Chicago.  I acquired racks, panniers, and other touring gear and set off in August.  I carried a gigantically heavy tent, a supremely bulky fleece jacket, and not one piece of rain gear.  That didn’t matter – I wanted to transport myself from Dayton to Chicago via a decidedly indirect route.

At the time, I idolized Christopher McCandless and longed to run off and live in the woods.  I’d often be anti-society and say things to the tone of, “I generally don’t like people.”  During that bike tour, I had the pleasure of meeting so many friendly, helpful people.  The sentiment turned into seeing that people are generally good.

And Further

The following winter I learned about an Adventure Cycling bike route between Banff, Canada and the US-Mexico border.  Riding the Great Divide Mountain Bike Route was immediately added to my to-do list.

I bought some equipment for the ride – proper rain gear, a stove, a lighter tent, and warmer sleeping bag – and figured how to lash it all to the bike.  A few months and less than 500 miles of “training” later, I set off on the Great Divide.  It was quite a learning experience.

Spray Lake Res

Becoming A “Proper” Cyclist

While loitering in a bike shop in Jasper, Canada while my bike was being packed to ship home, I started looking at road bikes.  The bald tires and sub-20 pound package looked quite appealing compared to my dump truck of a bike.  Two months later in Dayton, OH I purchased a road bike.  Instantly, I was riding 4-5 mph faster with no extra effort!  I started valuing riding speed over exploration.  Instead of a 4-hour, 50 mile ride on random farm roads, I chose to ride the same 15-25 mile out-and-back to see how my time improved.  I became aware that components are sold at different levels.

The Great Divide comfort bike lived in the basement after getting the road bike, until one day I was invited on a proper mountain bike ride.  After riding an aggressive road bike, the Schwinn felt clunky, unresponsive, and slow.  I started to consider myself a proper cyclist now, and being seen on that bike was a bit embarrassing.  I never used it again.

Moving Up (in altitude)

After college, I moved to Colorado.  Riding the Great Divide made me realize I wanted to live in or very close to the mountains. After looking for jobs in towns close to the Great Divide and applied to a few in Colorado and Montana, I accepted one in Boulder, CO.  I bought a proper mountain bike and moved to Colorado.

My goal was to bike the entire Colorado Trail prior to starting my job.   I assumed that my strength from the previous year’s Great Divide trip would make the CO Trail easy.  Nope.  I packed my bike similar to the Great Divide, and tried to ride some climbs.  Talk about humble pie.  My legs weren’t strong enough, I lacked the technical skills, and racks/panniers were heavy and clumsy.  I settled for local overnight bikepacking trips instead.  Slowly I started acquiring bikepacking bags to make the bike more nimble.

Rollins Pass Top

Technology, Leveling Up

I acquired a Garmin Edge 500 in 2012 and soon discovered a website called Strava.  Now, instead of recording my ride distances/speeds in a spreadsheet, I could compete against myself and other riders on a segment-by-segment basis.  It is addictive.  Often before rides, I check my intended route to see where the segments start and end to plan efforts.  Sometimes I’ll even choose a route based on the weather conditions.  “Hey – with a moderate tailwind, I can set a new PR long, maybe even a top X spot on that long, slightly-inclined segment.”  I bet I’m not alone in doing this.

Not Done Yet!

Next?

Racing the Tour Divide has been on my radar for the past few years.  I half-assed trained for it in 2014 and gave it 95% effort in 2015.  I’m still not done with it.  I’m torn between racing and fast-touring the route.

2015-05-16 16.00.26

Pros: Race
Something about giving 100% effort for 20 – 25 days is very enticing.  It is a very pure way to find and push my physical and mental limits.  My life is in a very good place to support a training schedule and time off for the race.  I do contract web development work and have the ever-important “girlfriend sign-off” to race, so it’s completely in my hands.  My situation can change in the future.  I’d kick myself if I get a “normal” job next year, and no longer have the option to race.

Pros: Fast-Tour
The main roadblock that stopped me from racing in 2015 is feeling that I wouldn’t be able to enjoy the route if making/breaking camp, pit stops, re-fueling is all rushed.  At a fast-touring pace, I could push myself to whatever distance I want, yet still take rest days or stop at interesting places.

The Tour Divide isn’t going anywhere.  The average racer age is early 40’s.  I have 15 years to get there.  Plenty of time to make it happen, if not this year or next.  Who knows…

Unfinished Business

After deciding not to start the 2015 Tour Divide, I wanted life to return to normal. I stripped the bike of all bikepacking gear, removed the now unnecessary aerobars, and gave it a good washing. Any remnants of bikepacking gear and training might cause me to re-think my decision not to race. It was time to ride hard and fast on narrow trails with an unladen bike.

I decided to keep the MRP Rock Solid rigid fork mounted rather than switch back to my 100mm Lefty.  I’ve heard that riding a rigid fork makes you a better rider – you have to pick lines more carefully rather than have your suspension smooth out your mistakes.  Plus, the Lefty fork needs to be re-built.  Even more work, I’d have to remove a Lefty => QR9 hub adapter that I installed, re-dish the wheel, and risk damaging the hub bearings.

Fast forward to October 2015 – riding the rigid fork was getting quite old.  My hands constantly hurt during when riding rocky singletrack.  I was seriously under-biked for many of the trails and crashed hard once because of it.  I decided I would re-install the Lefty for a more comfortable, controlled ride.

I put the bike on a repair stand and started cleaning the fork and headset prior to disassembly.  I couldn’t bring myself to swap out the fork, though.  It irked me that I had never was able to organize the cockpit for the Tour Divide.  I wanted to see if I could figure out a better configuration.  Instead of replacing the fork, I reinstalled aerobars and brought some bikepacking gear out of storage.

I’m in the process of figuring out a proper cockpit for the Tour Divide.  Partly for fun; Partly because 2016 is here and the Tour Divide Bug has started stirring in my brain.  Nothing is decided yet.